Guides
Fitting Roof Racks Safely
Racks rarely fail because the metal broke. They fail because the wrong fit kit went on, the clamps were hand-tight, or nobody checked them again.

Roof & Route is funded by affiliate commission. If you buy through a link on this page we may earn a commission at no extra cost to you. It never decides what we recommend or the order we recommend it in — read the full disclosure.
The direct answer: a roof rack is fitted safely when the fit kit matches your exact vehicle and model year, every clamp is torqued to the figure in the instructions rather than to hand-tight, the bars are at the spread the instructions specify, and you re-check all of it after the first loaded trip. Those four things, in that order, prevent nearly every real failure.
Racks almost never fail because the metal broke. They fail for three reasons, and all three are fitting problems rather than hardware problems: the wrong fit kit was used, the clamps were never properly tightened, or the load was attached to something that was not designed to carry it.
This page is deliberately not an installation walkthrough. If you want the step order — bars out of the box, feet on, kit in, position, tighten — that is our install guide. And if you want the two-minute walkaround to run before every trip, that is the pre-trip safety check. This page covers what goes wrong in between: the mistakes that survive a correct installation.
One framing that helps. Every roof rack is a chain of four things — the car’s roof, the fit kit, the foot pack, the bar — and then the load on top. The chain is only as strong as its least-checked link, and the least-checked link is almost always a clamp somebody assumed was tight.
Quick picks
Tap any row to jump to the full write-up below. Scores are our editorial judgment on published specifications — not a star rating, and not a product we claim to have tested.
| # | Product | Best for | Score | Price |
|---|---|---|---|---|
| 1 | 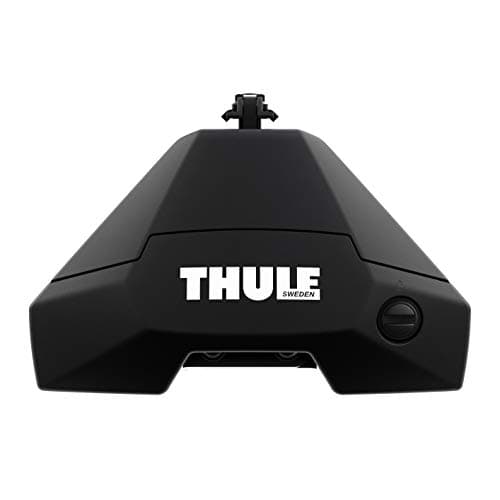 Thule Evo Clamp foot packA door-aperture foot pack with no drilling — and the clearest example of why the vehicle-specific kit is not optional. | The fit kit case: a bare roof | 8.4 | |
| 2 | 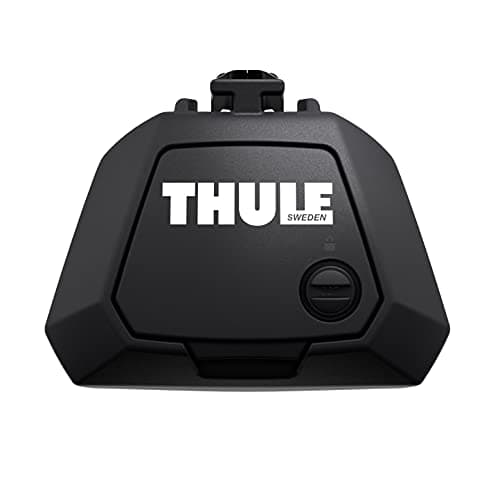 Thule Evo Raised Rail Foot PackClamps around a raised rail with a visible gap underneath. No fit kit, far fewer ways to get it wrong. | The easiest case to get right | 8.3 | |
| 3 | 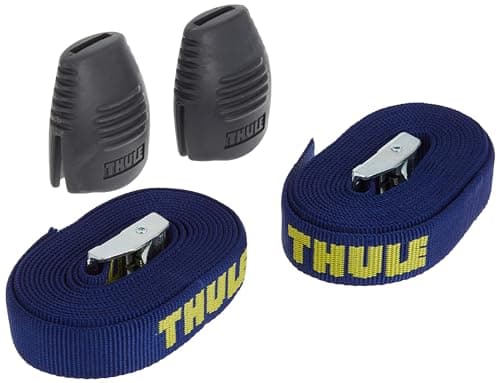 Thule Load StrapsHand-tensioned by design, wraps the bar rather than clamping it, and has a rubber buckle guard so the hardware does not mark the car. | The right strap for a roof load | 8.3 |
Prices checked October 18, 2026. Product photographs come from Amazon and are refreshed with the prices. Affiliate disclosure.
#1 · The fit kit case: a bare roof
Thule Evo Clamp foot pack
A door-aperture foot pack with no drilling — and the clearest example of why the vehicle-specific kit is not optional.
- For
- Bare roof, no rails
- Mounting
- Door aperture, no drilling
- Needs
- A vehicle-specific fit kit
- Drilling
- None
What works
- No permanent change to the car and nothing to undo at trade-in
- Vehicle-specific pads mean the clamp load lands where the body is strong
- Takes the whole Thule Evo bar range
- Published torque figures to work to rather than guesswork
What doesn’t
- Useless without the fit kit for your exact vehicle and model year
- Door-aperture clamps need a genuine re-check after the first loaded trip
- Two purchases on top of the bars
Our scoring
8.4overall
#2 · The easiest case to get right
Thule Evo Raised Rail Foot Pack
Clamps around a raised rail with a visible gap underneath. No fit kit, far fewer ways to get it wrong.
- Type
- Clamp-around foot pack, set of four
- Fits
- Raised side rails with a visible gap
- Does not fit
- Flush rails or a bare roof
- Drilling
- None — the feet clamp around the rail
What works
- No vehicle-specific part, so nothing to order wrong
- The rail is a designed load path, which is the safest thing to clamp to
- Moves to another raised-rail car without a second purchase
- Fewest failure modes of any mounting type
What doesn’t
- Only correct on raised rails — a flush rail or a bare roof needs something else
- Still needs the published torque and a re-check
- Rail position fixes how far apart the bars can sit
Our scoring
8.3overall
#3 · The right strap for a roof load
Thule Load Straps
Hand-tensioned by design, wraps the bar rather than clamping it, and has a rubber buckle guard so the hardware does not mark the car.
- Tension
- Hand only, by design
- Fits
- Any bar, because it wraps rather than clamps
- Guard
- Rubber buckle guard
- Sized for
- Roof-rack spans
What works
- Hand tension is correct for a roof load — you cannot over-crush the cargo
- Wraps any bar shape, so it works on aero, square and factory rails
- Buckle guard keeps the hardware off the paint and the glass
- Sized for roof spans rather than for a flatbed
What doesn’t
- Not a replacement for a ratchet strap on a dense, heavy load
- Hand tension needs re-checking as the webbing settles
- Webbing hums in the wind unless you twist the free span
Our scoring
8.3overall
Step by step
Step 1
Confirm the fit kit is for your exact vehicle and year
Check the fit kit part number against the manufacturer's fit guide for your model year, not just your model. If no kit is listed for your car, the system does not fit it — do not substitute a kit for an adjacent year.
Step 2
Set the bar spread the instructions specify
Position the feet at the spread given in the foot pack instructions, and check that spread against the required spread of any carrier you intend to mount. Mark the position with a pencil line so a re-fit lands in the same place.
Step 3
Tighten to the published figure, not to hand-tight
If the foot pack has a tension indicator, tighten until it clicks and then stop. If the instructions print a torque figure, use a torque wrench. Over-tightening past an indicator can crush a seal or deform a rail.
Step 4
Load heavy low and centered between the bars
Put dense items in the cabin and only bulky light items on the roof. Center the roof load between the bars rather than over one of them, and keep it within the vehicle's published dynamic roof load including the rack itself.
Step 5
Strap to the bars with the right strap, twice for long loads
Attach straps to the crossbars, never to side rails or bodywork. Use cam or hand-tensioned straps on anything crushable and ratchets only on dense hard cargo. Anything long gets separate bow and stern lines as a second independent restraint.
Step 6
Re-check after the first loaded trip and every season
Push the bars sideways, lift at each end, press over every box latch, and tug every strap. Everything settles once, and the first loaded hour is when a under-tightened clamp reveals itself.
The six mistakes that cause real failures
In rough order of how often they are the cause.
- The wrong fit kit, or no fit kit. A foot pack is matched to a roof type; a fit kit is matched to your exact vehicle and model year. Using a kit for the wrong year puts the clamp load somewhere the body was not designed to take it. If no kit is published for your car, the system does not fit your car — that is the answer, not an obstacle.
- Hand-tight clamps. Every foot pack has a published torque figure or a built-in indicator that clicks, and both exist because hand-tight is not a specification. This is the single most common cause of a rack moving on the roof.
- No re-check after the first loaded trip. Everything settles once. Pads compress, webbing stretches, bolts find their seat. The first loaded hour is when you find the clamp you under-tightened, and the only way to find it is to look.
- Bars at the wrong spread. Carriers publish a required bar spread, and so do foot packs. Too close and the load is unstable; too far and the feet sit outside their designed positions. Our crossbar spread guide has the measurement.
- Loading to the rails instead of the bars. Factory side rails are for mounting crossbars. They are not a place to strap cargo to, and a strap over a rail puts load into it in a direction it was never rated for.
- Ignoring the roof load limit. The published dynamic figure includes the bars, the feet and the carrier before any cargo. Our weight limits guide does the arithmetic and the vehicle pages carry the figure where the manufacturer publishes one.
The torque question, answered plainly
People ask whether they really need a torque wrench for a roof rack. Here is the honest answer in three parts.
If the foot pack has a click or a tension indicator, no. Several systems build the specification into the hardware precisely so you do not need a tool. Tighten until it clicks, then stop — over-tightening past the indicator is its own failure mode and can crush a door seal or deform a rail.
If the instructions print a figure, use a wrench. A printed newton-meter or inch-pound figure exists because the clamp’s grip depends on it. Guessing is how people end up at both ends of wrong: loose feet that walk along the rail, or crushed trim.
Either way, the figure is not a one-time event. Check it after the first loaded trip, then at the start of each season, and any time the rack has been off and back on. A small inexpensive torque wrench is cheaper than one repainted roof.
The same logic applies to the carrier that goes on top. A box clamp, a bike rack clamp and a kayak cradle all have a specified tightness, and on the boxes with a positive-click mount the click is the specification.
Attaching the load safely, not just the rack
A perfectly fitted rack with a badly attached load is still a hazard on the highway. Four rules cover almost everything.
Strap to the bars, never to the rails or the car. The bars are the structure. A strap around a side rail, a door frame or a mirror is loading something that was never rated for it.
Use the right strap for the load. Cam straps and hand-tensioned load straps for anything that can be crushed — hulls, boards, soft bags. Ratchets for dense, hard cargo where you need real tension. Our ratchet versus cam comparison covers the choice and the tie-down guide covers the order.
Two independent restraints on anything long. A kayak, a canoe, lumber or a ladder gets hull or body straps and separate bow and stern lines to the vehicle, so a single failure does not release the load. Our kayak tie-down guide has the sequence.
Deal with the loose ends. A flapping strap tail will scratch paint for four hundred miles and can find a wheel. Twist the free span to stop it humming, and tie or tape the tails down. NHTSA treats unsecured cargo as a real road hazard rather than a nuisance, and so should you.
The re-check routine, in order
Do this at four moments: after fitting, at the first gas stop, each morning of a multi-day trip, and at the start of every season.
- Push the bars sideways, hard. They should not move along the rails or across the roof at all. Any movement means a foot is loose.
- Lift at each end of each bar. No lift, no rock.
- Press over every latch on a box. Walk its full length. A latch that was never engaged feels different from one that was.
- Tug every strap. Webbing stretches in the first hour more than it will for the rest of the trip.
- Look at the loose ends. Tails tied, nothing flapping, nothing touching a tire.
That is ninety seconds. It catches every one of the six mistakes above, which is the whole argument for doing it. If you want the printable version to keep in the glovebox, our safety check guide is laid out for exactly that, and the first-rack guide covers what to buy if you are starting from nothing.
Common questions
How do I fit a roof rack safely?
Do I need a torque wrench for a roof rack?
Why does my roof rack keep coming loose?
Can I strap cargo to my roof rails instead of the crossbars?
Does a roof rack need a second restraint on long loads?
Sources
Not sure it fits your car?
Our vehicle pages carry the published roof load limit, the roof type by model year, and what actually mounts to it — cited, and honest about what the manufacturer does not publish.
Read next
How to Install a Roof Rack
Preparation, positioning, torque and the follow-up checks that prevent creeping and paint marks.
How to Fit and Check a Roof Rack Safely
The six-point pre-trip rack check, the four real failure modes, and what to retighten when.
What Size Crossbars Do I Need?
How to measure crossbar spread and length, and what each carrier type needs.
How Much Weight Can a Car Roof Rack Hold?
Dynamic versus static limits, what the figure includes, and why the rack's rating is not yours.